Back to menu
Running hard disk images
Hard disk images contain all the data of
games on hard disks . The files have
generally the extension .dsk, just
like the most used extension for disk image.
So, it means that the way to use a hard disk
image is very close to the way to use a disk
image. There's actually only one step more :
the addition of IDE or SCSI controllers to
the machine that you want to run.
| First step :
add IDE or SCSI controllers to a
machine |
- click on
File / Cartridge Slot 1 (or Slot 2) / Insert
Special / IDE
or File / Cartridge Slot 1 (or
Slot 2) / Insert Special / SCSI
- select one of the 3 available IDE
controllers : Sunrise / Beer / GIDE
or one of the 3 available
SCSI controllers : Mega-SCSI / Wave-SCSI /
Gouda SCSI
You need also to select the SRAM size for
Mega-SCSI or Wave-SCSI.
The most handful IDE system on MSX is the
Sunrise system.
So, generally, you will add a Sunrise IDE
controller to a MSX2, MSX2+ or MSXturboR
machine.
TIP : Use the Machine Editor
to create for example a MSXturboR with IDE
controllers, it will allow you to skip this
step the next time that you want to run an
hard disk image !
SCSI hard disk images are not compatible with
the Sunrise IDE hard disk images.
For more infos about the 3 IDE systems and
the 3 SCSI systems, see this page.
| Second step
: insert an hard disk image |
- go to File / Hard Disk
As you have added an IDE controller, this
menu can now be used and is a little
different for each IDE or SCSI type :
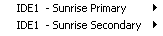 |
|
Sunrise IDE |
| |
|
|
 |
|
Beer IDE |
| |
|
|
 |
|
GIDE |
| |
|
|
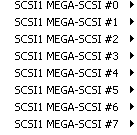 |
|
Mega-SCSI |
| |
|
|
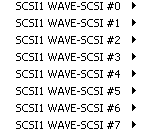 |
|
Wave-SCSI |
| |
|
|
 |
|
Gouda SCSI |
- go to the Primary Controller or the
only one available controller
You access to this sub-menu :
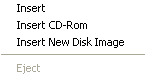
- click on Insert
- this choice calls the Window Explorer, it
allows to select a hard disk image
- when this choice is done, press on F9
(= Run) or on F12 (= Reset)
to start the game
TIP : you can also
use the mouse to drag and drop a hard disk
image in the blueMSX window, then press on F9
or F12.
OTHER OPTIONS
- The option Insert CD-ROM
(only available for SCSI at the moment) is
explained here.
- The option Insert New
Disk Image is explained here.
- The option Eject of
the sub-menu allows to eject the hard disk
image.
- The option Eject All Harddisk of
the hard disk menu allows to eject all
existing hard disk images.
Back to menu